
Ok, this morning I thought there was no way to get started on cute little Frida. All day, I kept thinking of all the chores that were left undone this weekend and that I promised I could get done tonight. How could I get both done. Anyways, I decided to alternate cleaning and prepping the pattern. Surely, my husband would not think I abandoned him as he was doing his share.
Step 1: The first thing I always do when I begin a sewing project is trace the pattern. I rarely ever cut it and use it directly from the package. I have often been asked what I use to trace it. While there are many papers that can be used such as Swedish tracing paper, I prefer to use Freezer paper. The benefits are plenty: you can buy it at the grocery store, it cost less than $5 for 50 ft, and it makes the preparation process go faster.
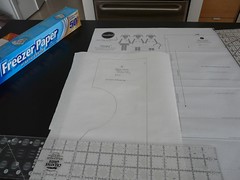
Simply cut out a piece of freezer paper slightly larger than the size of the pattern piece. Trace the pattern onto the paper with the shiny waxy side face down. Cut out each piece.
Step 2: Pick out the Fabric & iron it. I have chosen a whimsical Japanese fabric with little bunies on it with a plain white contrasting fabric for the bodice. I will embellish the bodice with a few coordinating red buttons.
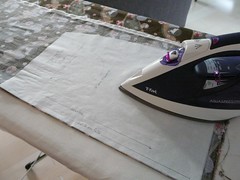
Step 3: Cut out the fabric. If you are using freezer paper, you can avoid using pins. Iron on the freezer paper pattern piece onto the fabric & cut out the fabric.

Then, if you need to reuse the pattern piece, gently tear away the freezer paper pattern piece and reuse. Eventually, the wax will no longer stick. If that is the case you can use pins to cut out the fabric.

Now, all the fabric is cut out and I am ready to progress.
Unforetunately, I will be off to bed soon and probably will not get to far since we're off to Tahoe this weekend. Maybe I will just look at the pretty pictures in the pattern booklet before bed :)

No comments:
Post a Comment