Friday, July 31, 2009

ModKids Frida - All Done and ready to ship...... (part 4)

WOW! What a difference a few degrees can make! It cooled down only a few degrees, but with the light breeze, I took a chance and got moving on Frida.

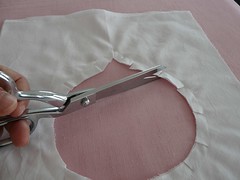
Step 7: Time to work on the skirt
I decided to skip the pockets mostly because I really like the fabric and wanted to show it off as much as possible.
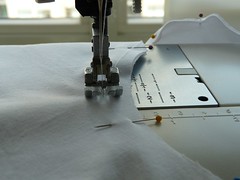
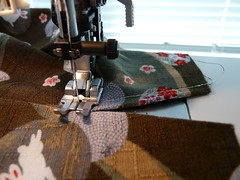
A) Sew side seams together. I chose to serge the seams to ensure a proper finish. I know Sofia usually plays lots in her dresses and it will often be washed. Patty recommends top-stitching at 1/8". However, I chose 1/4" since I could easily use my 1/4" foot without giving it much thought.

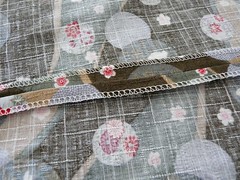
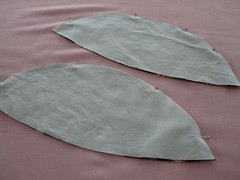
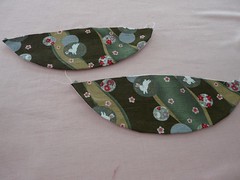
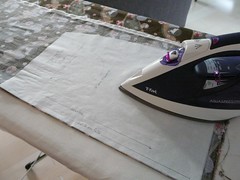
Step 8: Prepare the bottom skirt band. The instructions here are quite simple and easy to follow. This technique is very lovely and gives a great finished look. Reduces the need to have to properly measure and hem the skirt.
Step 9: Attach the skirt to the bodice. First you gather the skirt to match the width of the bodice. Then, sew the outer layer of the bodice to the skirt. I chose to sew and finish each bodice side at a time. When I prepped the lining to enclose the seam, I trimmed the seam allowance. The main reason for this is that my the bodice is white and the skirt is a darker colour and I did not want it to show through.

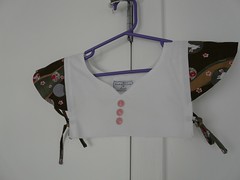
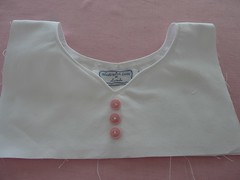
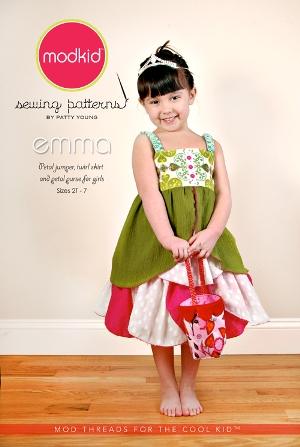
VOILA, IT IS FINISHED!!! Now, I just need to send it off to Sofia in Cairo, Egypt. She will certainly be a cool girl in this dress.


Key things to take note of with this pattern:
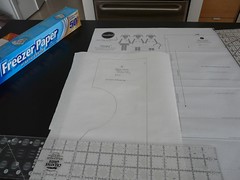
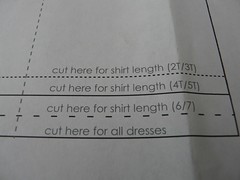
  1. Carefully read the pattern layout: I did not do this and when it came time to attaching the bottom band on the skirt, the band was not wide enough. Instead of Cutting on the line indicated for all dresses, I cut the fabric for the shirt length. Not a tragic mistake, but one more reason to pay attention to the pattern.
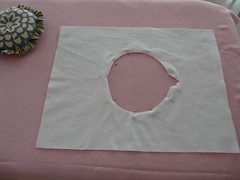
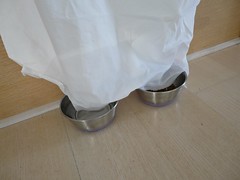
  2. If you get a new puppy, remember where the water bowl is now located. I have always cut my fabric on the kitchen island and have never aid attention to the fabric that hangs over the edge. Now, Chulita's water and food bowl are kept at the side of the island. Oops.....
For a full series of pictures of the sewing experience, check out my flickr set

FINAL THOUGHTS
Overall, I found that the instructions were easy to follow and well laid out. I definitely recommend this pattern to anyone wanting to sew for little girls. There are a variety of ways to put Frida together to get different looks. I also appreciate the booklet style of the pattern and paper it is printed on. It feels sturdy. I am confident, I can get many uses out of this pattern without it falling apart.
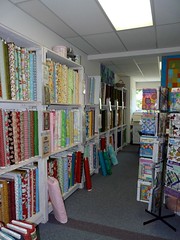
Now, if only I could get Patty's fabric here in Vancouver.

Wednesday, July 29, 2009

ModKids Frida - slow progress..... (part3)


Well, a few things have slowed the progress. First, it was the trip to Reno. Then, it was the campaign to get a new puppy, followed by the actual puppy. Now, it is the heat and lack of air conditioning combo. Who wants to iron when it is a record 31 degrees Celsius (91F) or 38 degrees with the humidity index (100F).

Step 6: Attaching the Sleeves and Ties to the bodice.
The Ties: As soon as I read the instructions for the tie, I knew I would like this pattern. I hate it when patterns call for sewing a narrow strip right side together and then turning it right side out. It drives me nuts to turn something so narrow right side out. Thanks, Patty, for considering this aspect of the instructions. Good Call.
Basically, you just fold the tie lengthwise wrong sides together. Then, fold it in again and topstitch. Easy enough.

Now with the ties done and the sleeves ready. I just pinned them in place and sewed it all together as per the instructions. The result is looking good. I can't wait to work on the skirt. Today, I had dreams of being able to iron, but it is really tooo hot. Stay tuned for more.
The next step is the pockets. I am debating whether or not to make them since the white might be too much of a contrast and you may not see the fabric quite as much. On the other hand Sofia really loves pockets and judges my sewing abilities by whether or not a garment has pockets. We'll see...


PS. The puppy's name is Chulita which meas Cutie in Spanish. I also got distracted by making her a reversible bandana. In a later post, I will include instructions on how to make one for your furry friend.


Wednesday, July 15, 2009

ModKids Frida - let's start sewing...... (part2)

Well, due to unforeseen circumstances, I now have a bit more sewing time than expected. So, for now I am possessed by Frida.
Step 4: Sew the Bodice
First I pinned the bodice right sides together.

Then, I went to my sewing machine to get going I read the pattern and was not sure how I would be able to turn it right side out. Perhaps it was the day I was having. In any case, I trusted the instructions and decided to go for it.

Then, I clipped the curved edges. Easy enough to do, just snip snip snip.

I then proceeded to turn it right side out and voilĂ  it worked. I wanted to embellish the front a bit since the white bodice seemed a bit too plain. I opted for a simple design of 3 pink buttons. My princess always gets excited with a dash of pink. To do this, I separated the fabric from the lining so that the lining would have a smooth finish. I also added a tag "Especially made by Lucinda" I really need to get some new ones, but I will blog about that later.

Step 5: The Sleeves
The step is fairly straightforward and does not require much thought. Basically just put one fabric piece and one lining right sides together. Sew the more rounded edge. Clip curved edges, turn right side out and press. Then, top stitch along the curved edge.


That's all for now, tomorrow I will take it a few steps further.
Hope you are enjoying my fun with Frida

Tuesday, July 14, 2009

ModKids Frida - here we go...... (part1)


Ok, this morning I thought there was no way to get started on cute little Frida. All day, I kept thinking of all the chores that were left undone this weekend and that I promised I could get done tonight. How could I get both done. Anyways, I decided to alternate cleaning and prepping the pattern. Surely, my husband would not think I abandoned him as he was doing his share.

Step 1: The first thing I always do when I begin a sewing project is trace the pattern. I rarely ever cut it and use it directly from the package. I have often been asked what I use to trace it. While there are many papers that can be used such as Swedish tracing paper, I prefer to use Freezer paper. The benefits are plenty: you can buy it at the grocery store, it cost less than $5 for 50 ft, and it makes the preparation process go faster.

Simply cut out a piece of freezer paper slightly larger than the size of the pattern piece. Trace the pattern onto the paper with the shiny waxy side face down. Cut out each piece.
Step 2: Pick out the Fabric & iron it. I have chosen a whimsical Japanese fabric with little bunies on it with a plain white contrasting fabric for the bodice. I will embellish the bodice with a few coordinating red buttons.
Step 3: Cut out the fabric. If you are using freezer paper, you can avoid using pins. Iron on the freezer paper pattern piece onto the fabric & cut out the fabric.


Then, if you need to reuse the pattern piece, gently tear away the freezer paper pattern piece and reuse. Eventually, the wax will no longer stick. If that is the case you can use pins to cut out the fabric.


Now, all the fabric is cut out and I am ready to progress.
Unforetunately, I will be off to bed soon and probably will not get to far since we're off to Tahoe this weekend. Maybe I will just look at the pretty pictures in the pattern booklet before bed :)

New Modkid Patterns arrived! Woohoo

Yesterday was a great day. I came home from work to a package of sewing patterns. I ordered them from FlairforFabric. I've been eager to try the patterns from Modkid. The styles look so cute and hip. I often tease that my niece is my best customer. Sofia is 4 yrs old and she loves all the dresses I make. She now even makes requests and suggestions on style. When I saw these patterns, I immediately thought of her. In the upcoming weeks (after a weekend trip to Reno for a race), I will post pics of the process of making one and review the pattern.
For now, my first impressions:
  • Presentation: beautiful color pics, nice booklet layout with lots of diagrams
  • Tips: given in the Things to Know - well written and good for sewers of all abilities
  • Directions: Very well written, simple and clear explanations. The diagrams and images help support the written explanation
I can't wait to get started. Still not sure if I will start with Frida or Emma. Sofia lives in Cairo, Egypt so either will be perfect for the hot weather. In the meantime, I will start picking out some fabric and prepping it. Stay tuned...

Friday, July 3, 2009

Hopscotch Camis GIVEAWAY!!!!

I want to start posting my own patterns, but that it a bit hard while I am still on a road trip. Patience, some hard work and it will come. In the meantime, I thought i would share a really cute pattern for girls.
Those that know me know that I love making clothes for my little niece / princess. I can't wait to get home and give this a try.
Hopscotch Camis GIVEAWAY!!!!

Thursday, July 2, 2009

The Quilted Angel

After a few days of drinking wine, eating chocolate & eating local cheeses, we decided to change things up a bit a went to visit Petaluma, California. This basis of this trip was a visit to the The Quilted Angel. The drive from Sonoma was extremely beautiful: endless fields of vineyards, cows enjoying being out in the pasture, hilly dry lands.
When we arrived in Petaluma, we entered via a more industrial area. There were some incredible buildings old brick buildings that had been carefully restore with ivy growing on the side. Other buildings still stand tallbut have certainly seen better days. Just a few moments later, we arrived at the Quilted Angel. The building itself was welcoming but did not seem large. How much fabric could they really have? From the outside, the building looked too narrow to hold much. Oh well, I thought. At least it would be a quick stop. Gilles decided to wait in the car. Once I started to explore, it felt as the the store was growing by leaps and bounds. The store seemed to go on forever. So many fabrics, so little time. Towards the middle of the store, there is a large classroom. It looked like it would be a lot of fun to take a class here. Their selection of books and patterns are amazing. They have pretty anything you could want or imagine. There were many things that I had not seen before.
Definitely worth a visit. At one point, Gilles came in thinking the shop had swalowed me alive. Almost, but not quite :) The ladies in the shop were lovely with him asking if he needed any help. When I called out to him, they all sighed a sigh of understanding what this goofball was doing in the shop.
I forgot to mention that we stayed at the Fairmont Sonoma Mission. Quite frankly it is amazing we went anywhere since the resort was fantastic.